
Choosing Your Pavilion Material


Compare Traditional Pavilion Models
| Material: | 14′ x 18′ starts at: | Available Sizes: | Roof Pitch: | Eave Overhang: | Columns / Posts: | Ceiling: | |
|---|---|---|---|---|---|---|---|
 Shoreline
| Vinyl | $10,589 |
|
|
|
|
|
 Montford
| Vinyl | $12,717 |
|
|
|
|
|
 Caribbean
| Vinyl | $14,100 |
|
|
|
|
|
 Lakefront
| Wood | $8,250 |
|
|
|
|
|
 Cheyenne
| Wood | $10,173 |
|
|
|
|
|
Compare Timber Frame Pavilion Models
| Material: | 16′ x 20′ starts at: | Available Sizes: | Roof Pitch: | Eave Overhang: | Gable Overhang: | Columns / Posts: | Roof Decking: | |
|---|---|---|---|---|---|---|---|---|
 Kingston
| Timber Frame | $19,991 |
|
|
|
|
|
|
 Kingston Pro
| Timber Frame | $24,234 |
|
|
|
|
|
|
 Denali
| Timber Frame | $25,507 |
|
|
|
|
|
|
 Grand Teton
| Timber Frame | $29,567 |
|
|
|
|
|
|
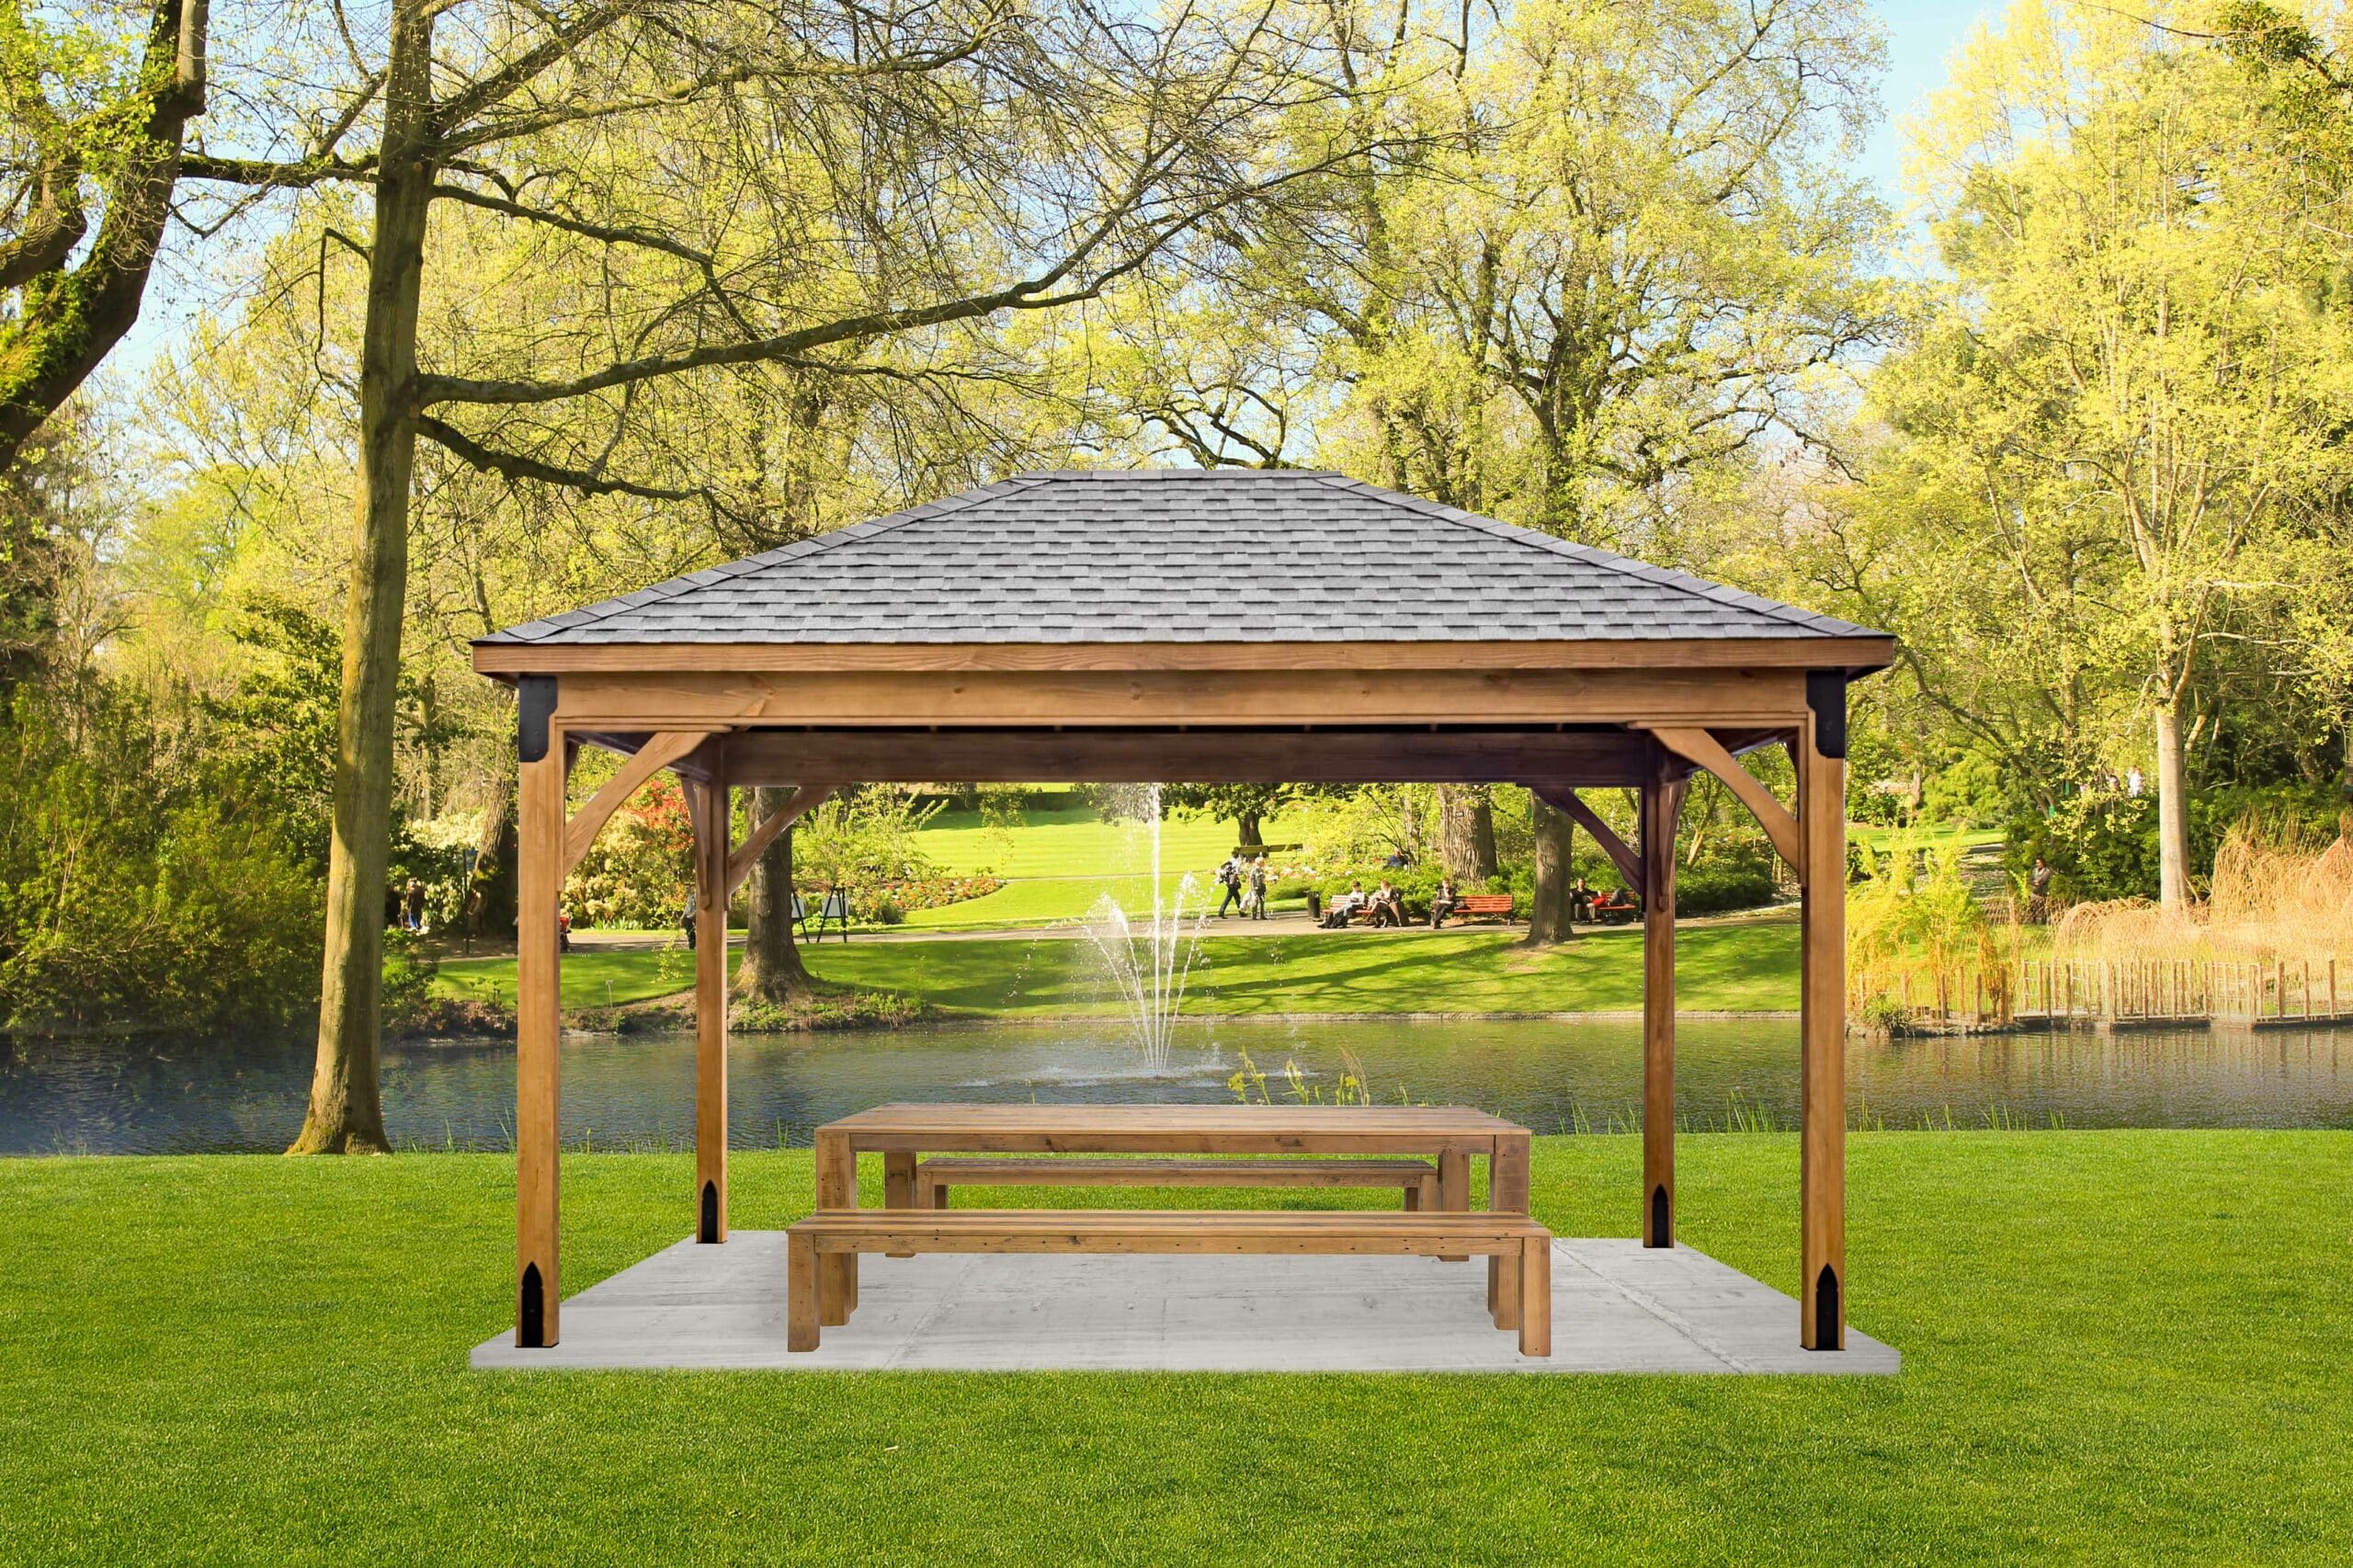
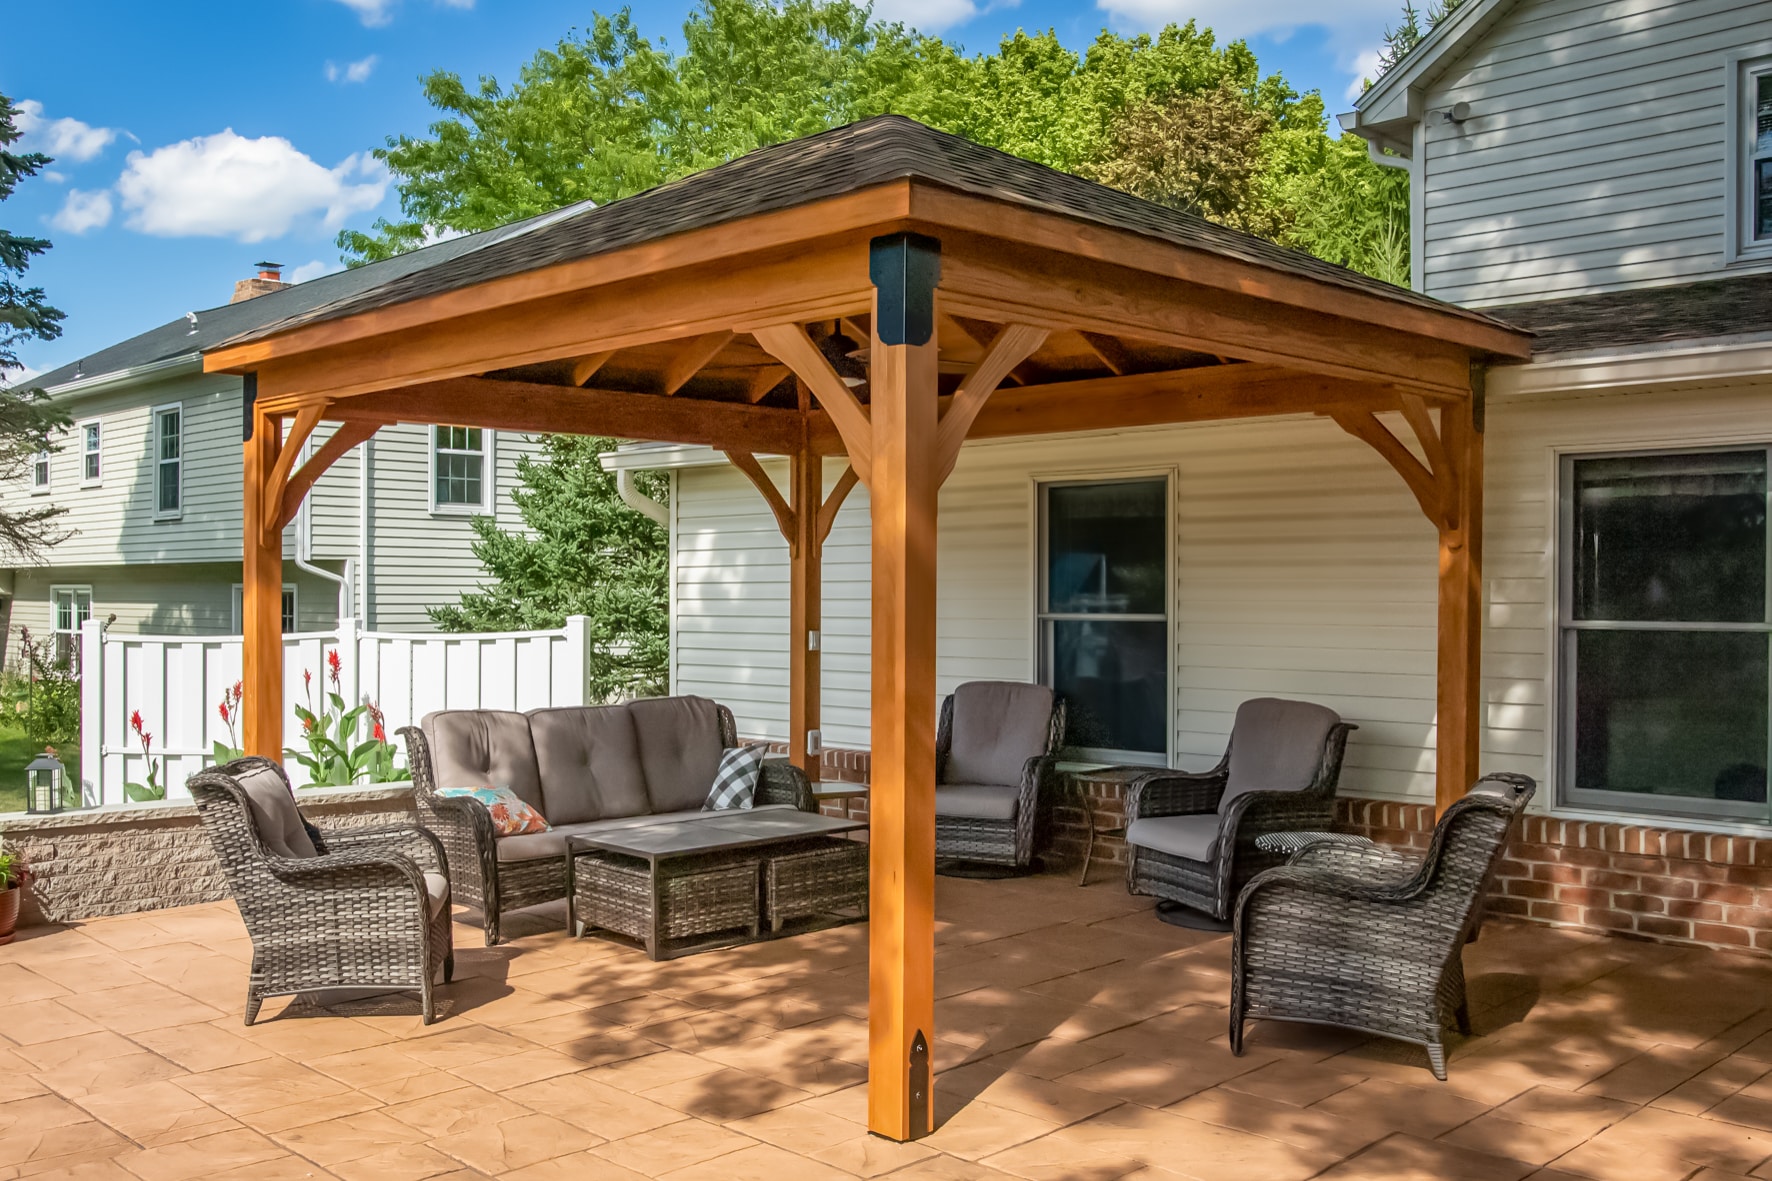
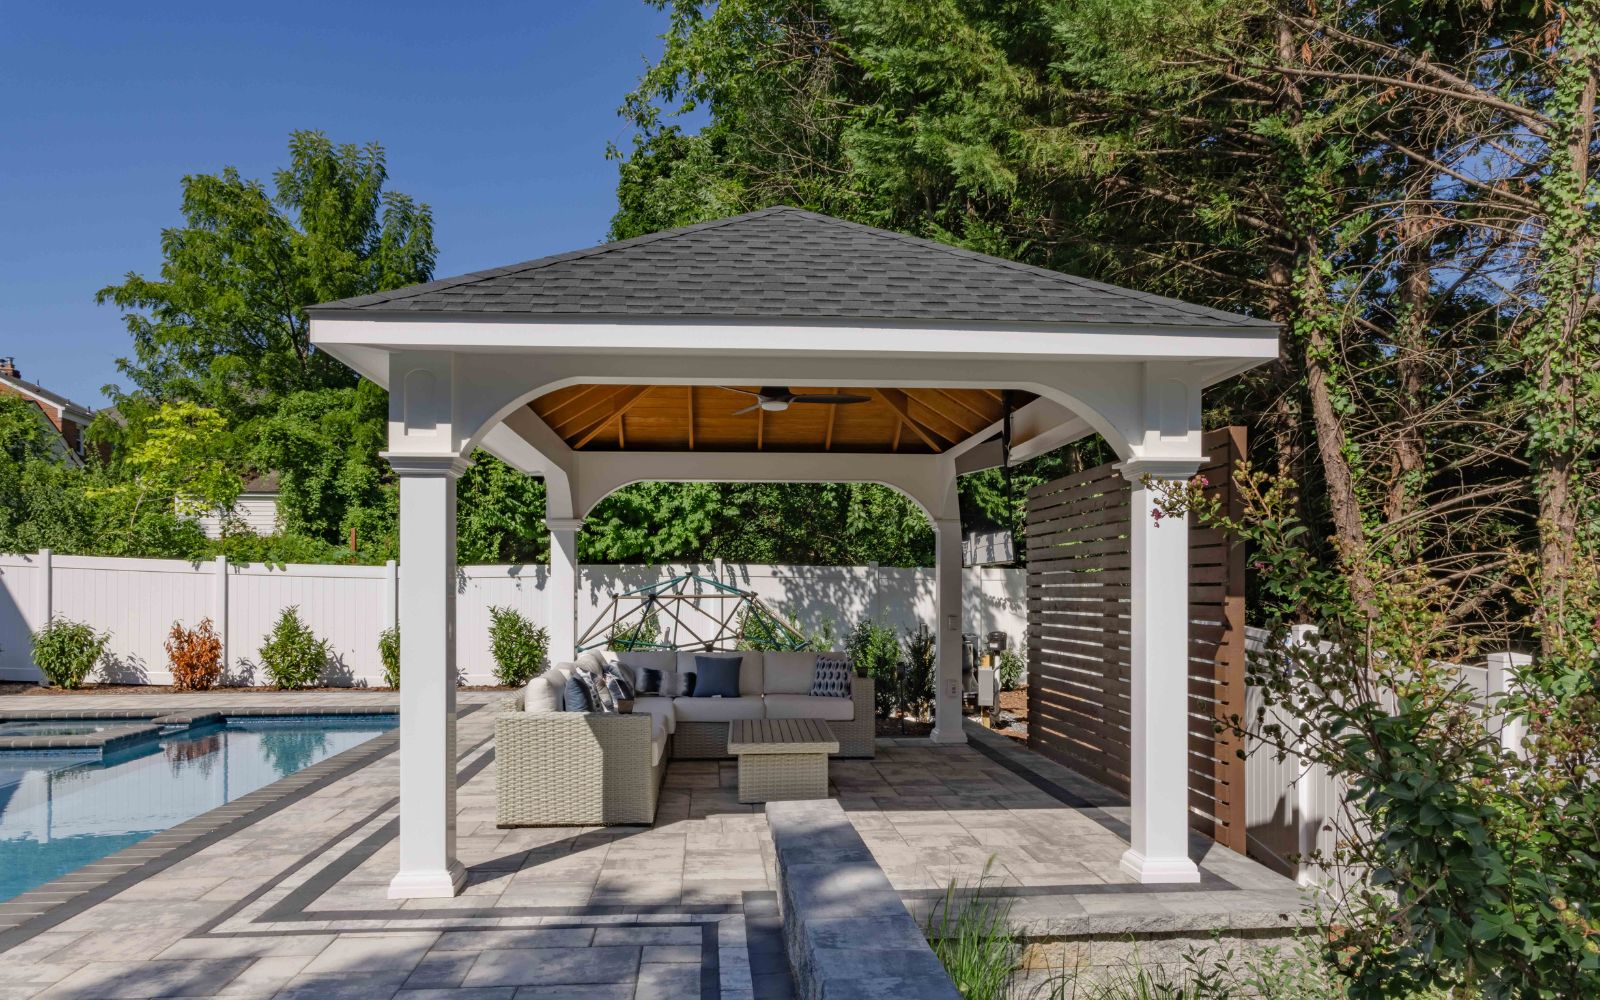
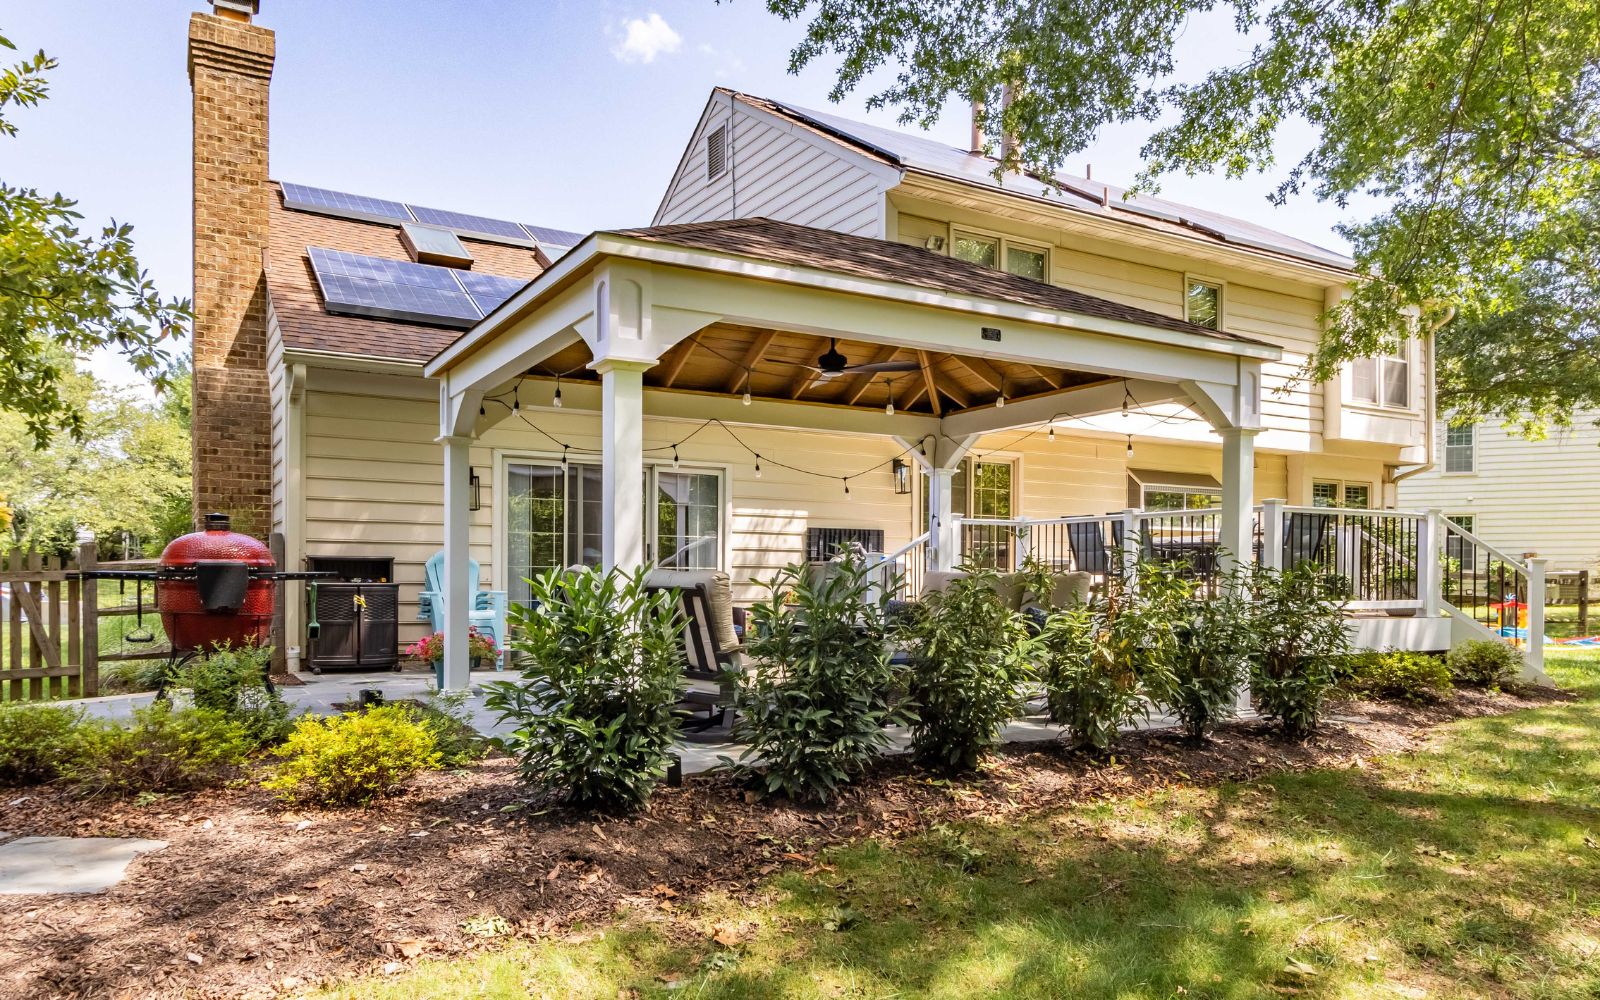
Pavilion Gallery
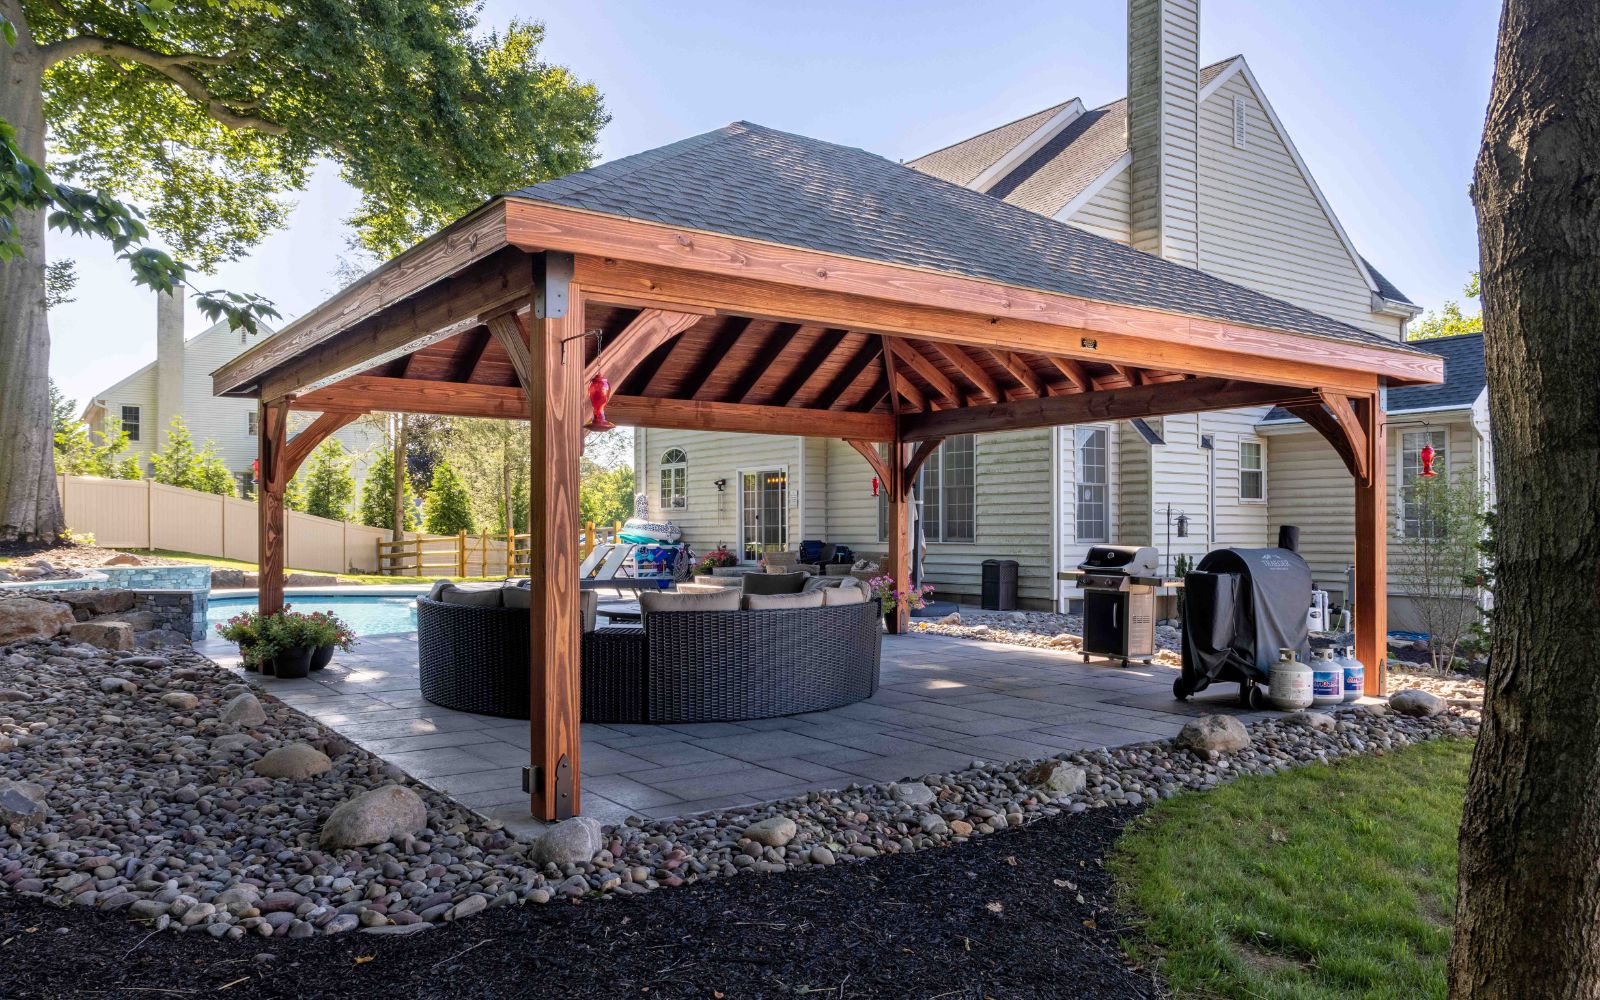
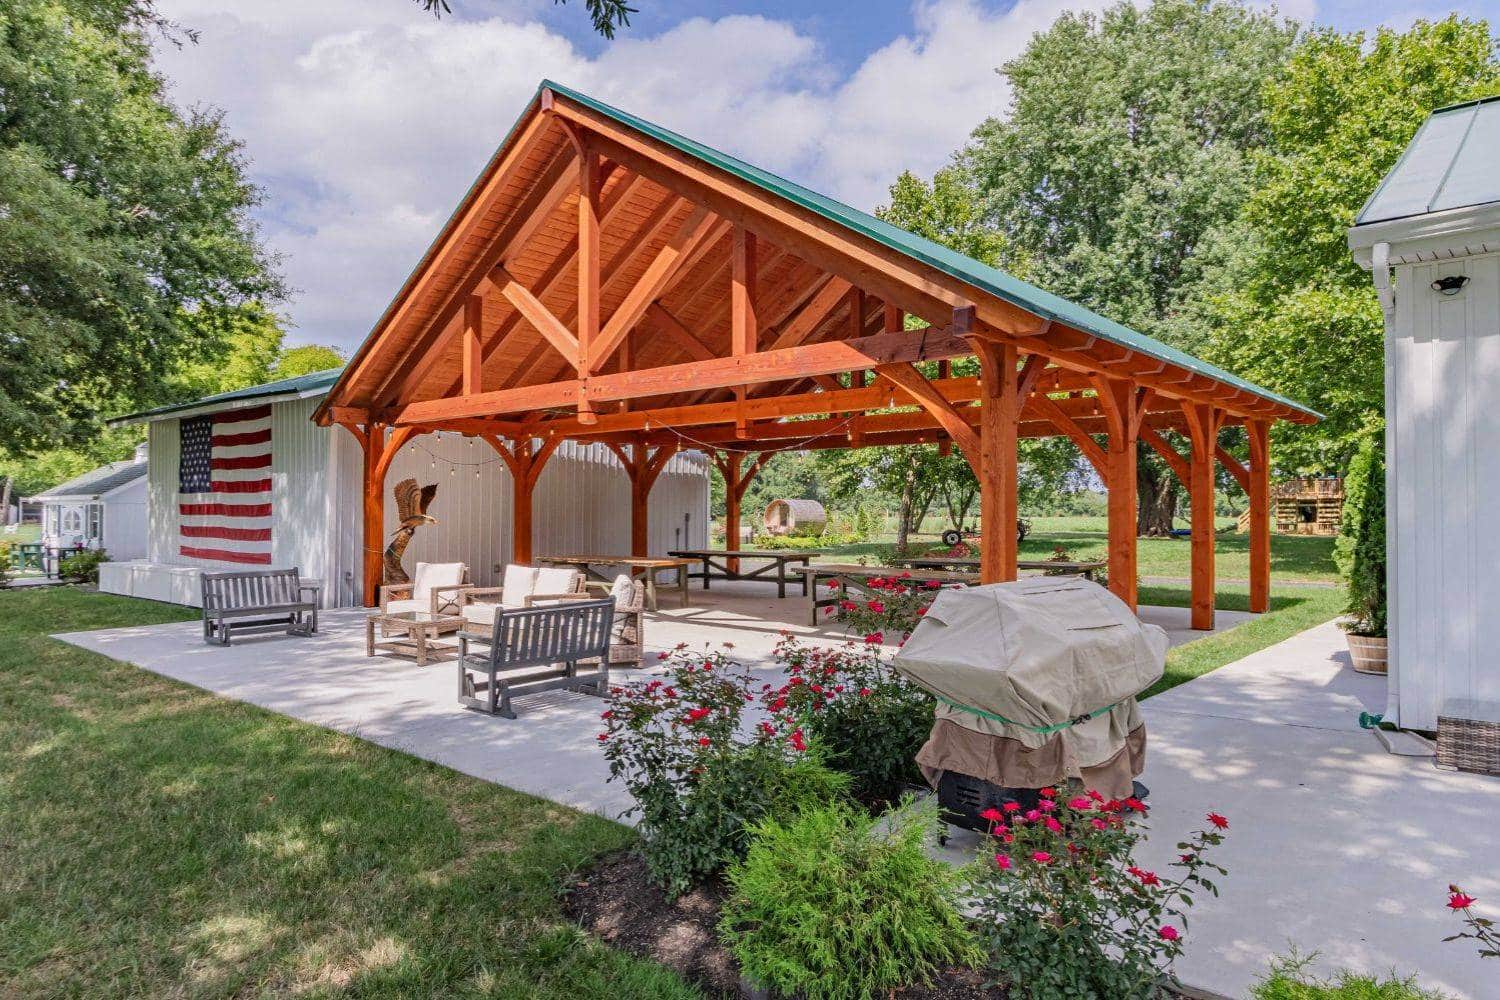
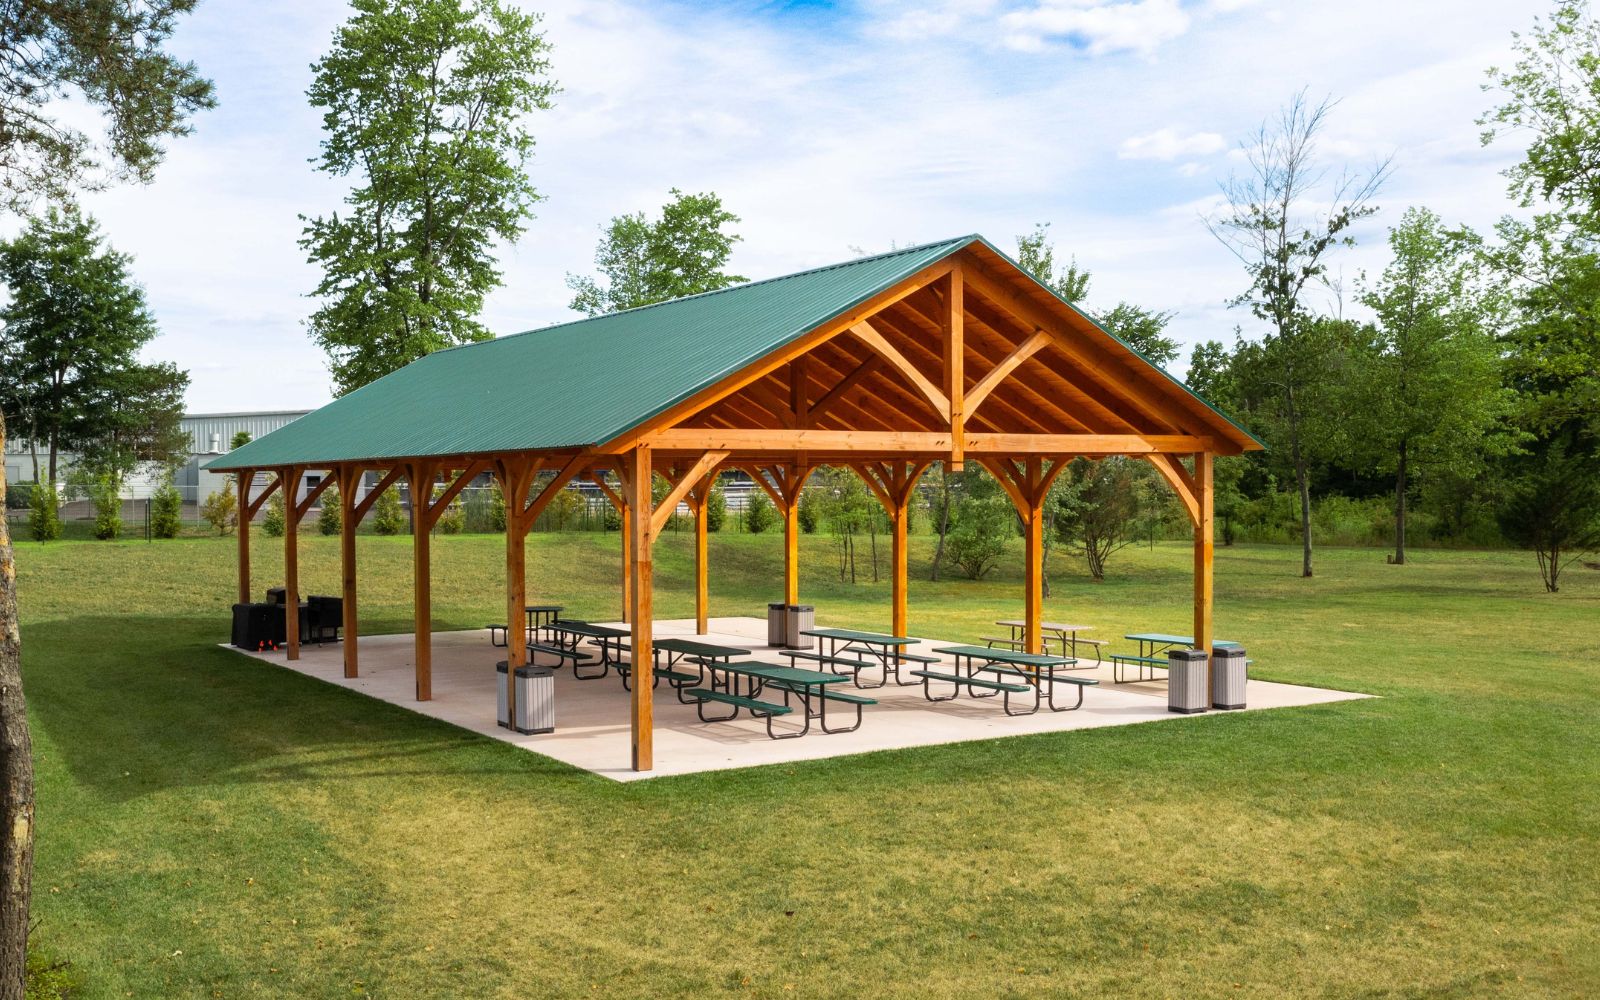
Elite Craftsmanship
With years of experience in the industry, our team strives to build the perfect outdoor pavilion for every customer. Every project begins with a thoughtful conversation about your space, goals, and the look and feel you want to achieve. From there, we carefully source our materials, chosen not just for their strength, but also for their aesthetic appeal and long-term performance. Our skilled builders then bring everything together with precise craftsmanship, ensuring that every cut, joint, and finish meets our exacting standards. We don’t just build structures, we create outdoor spaces that invite relaxation, connection, and lasting memories. From the first planning step to the final installation, our goal is to deliver a pavilion that reflects your vision and stands the test of time.


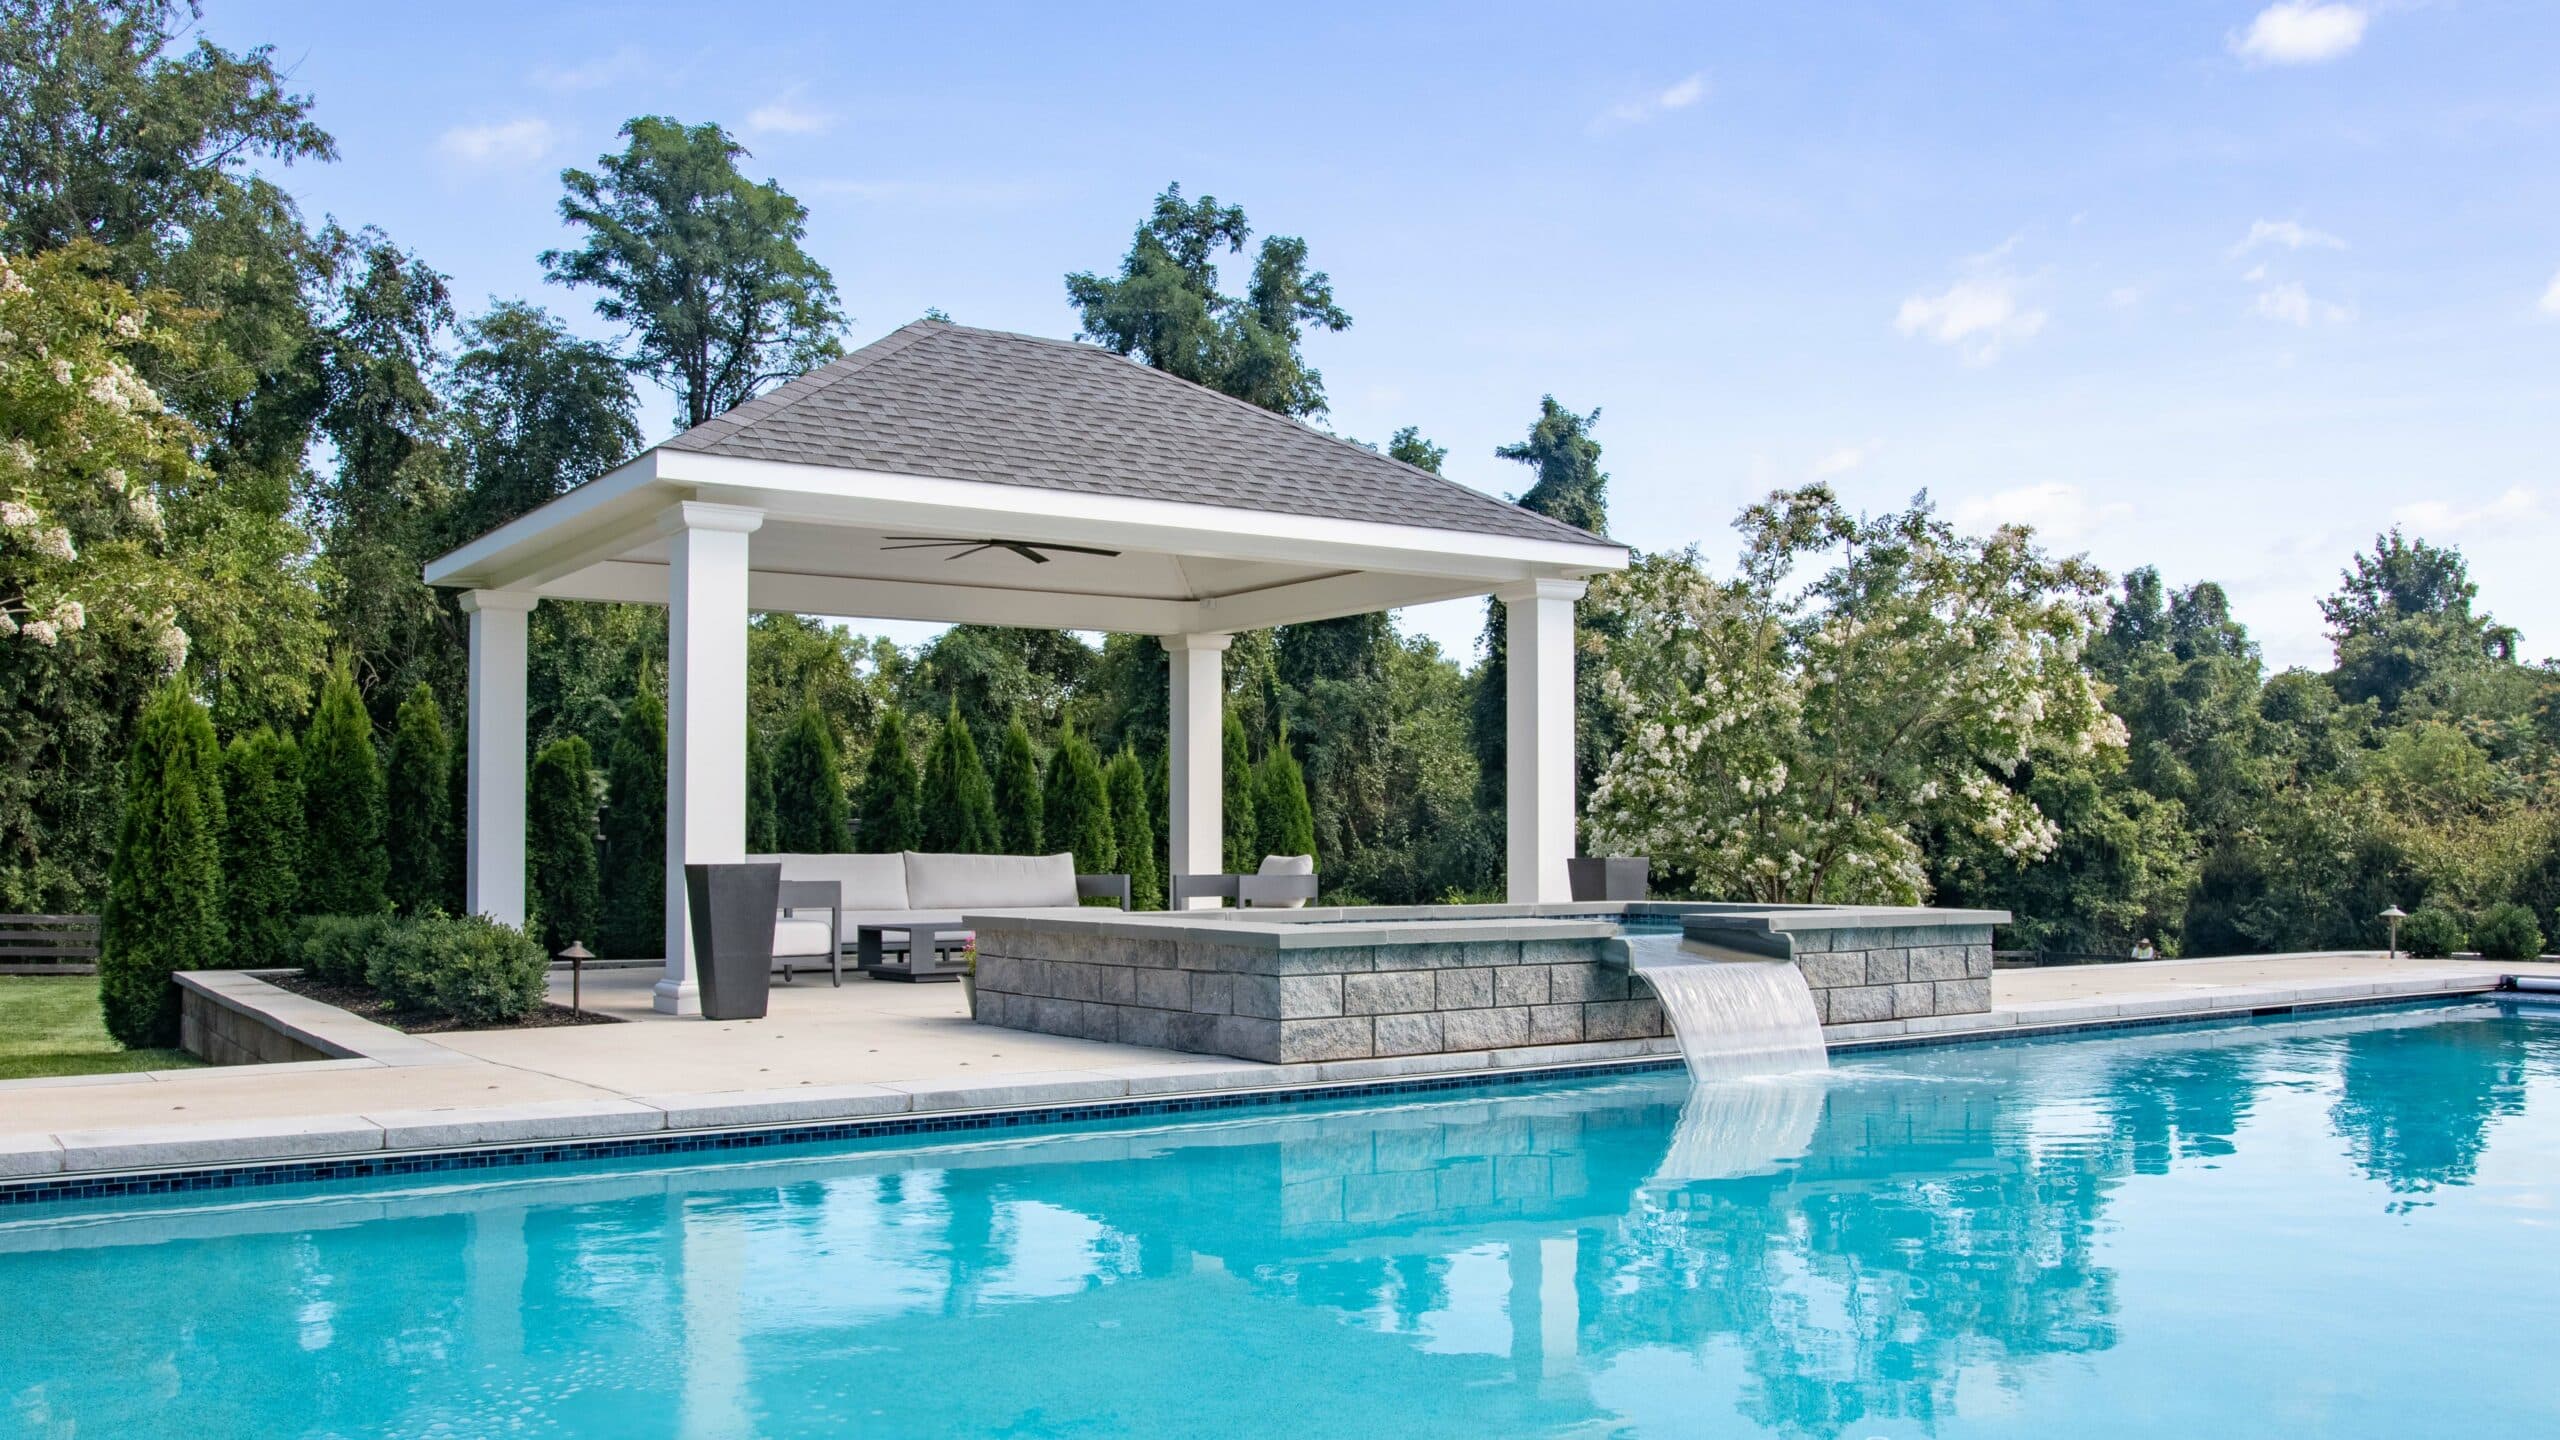
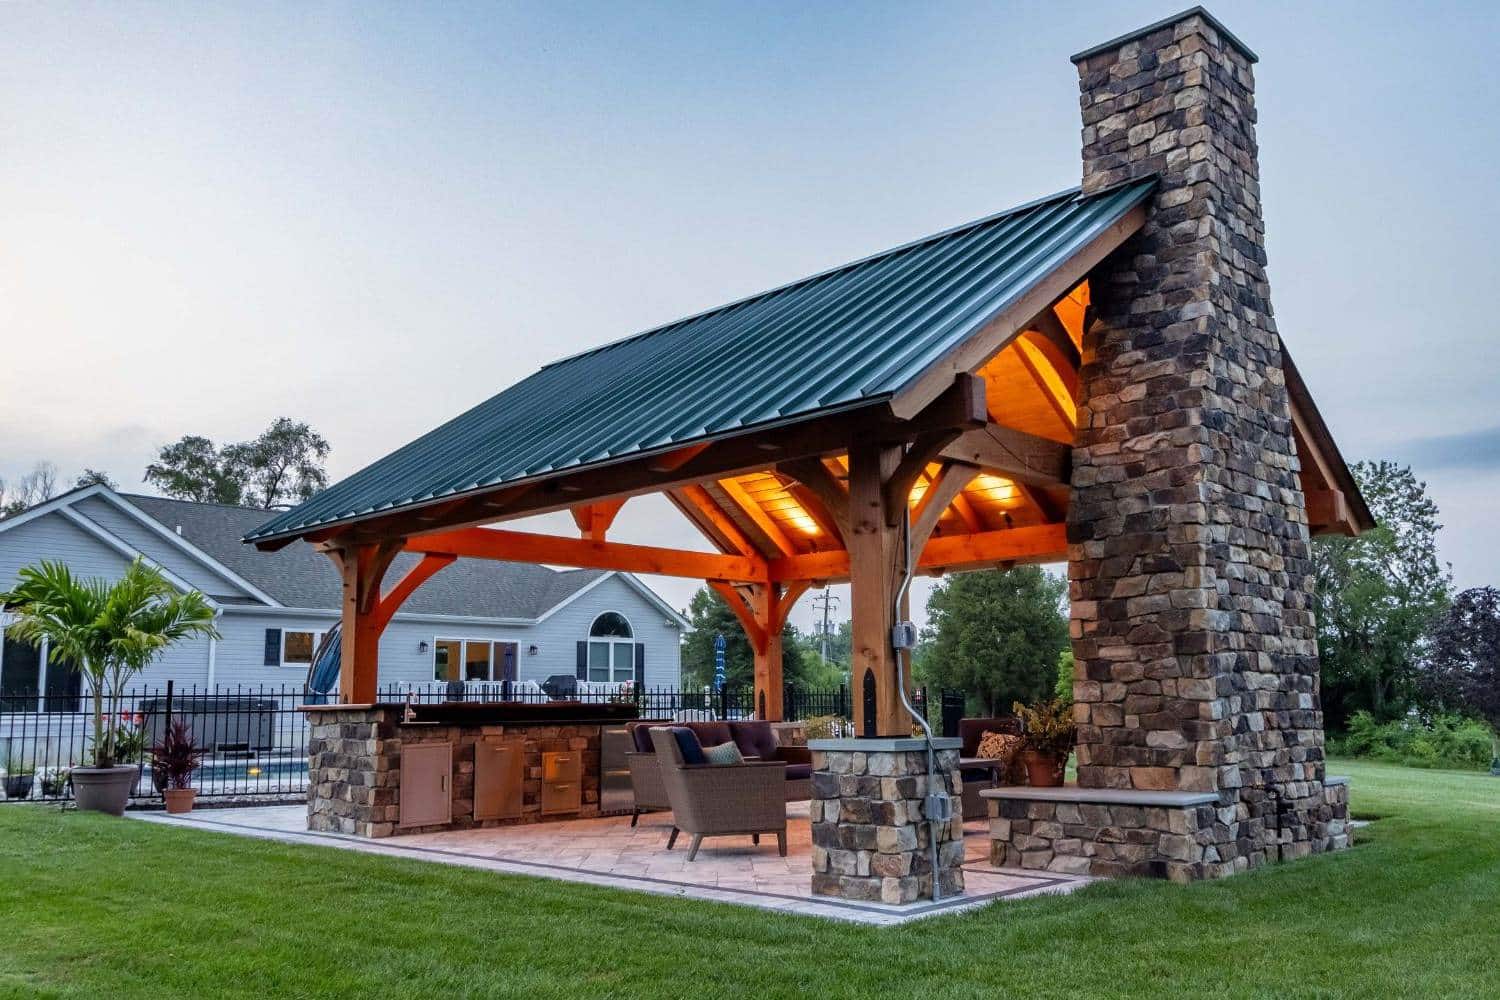
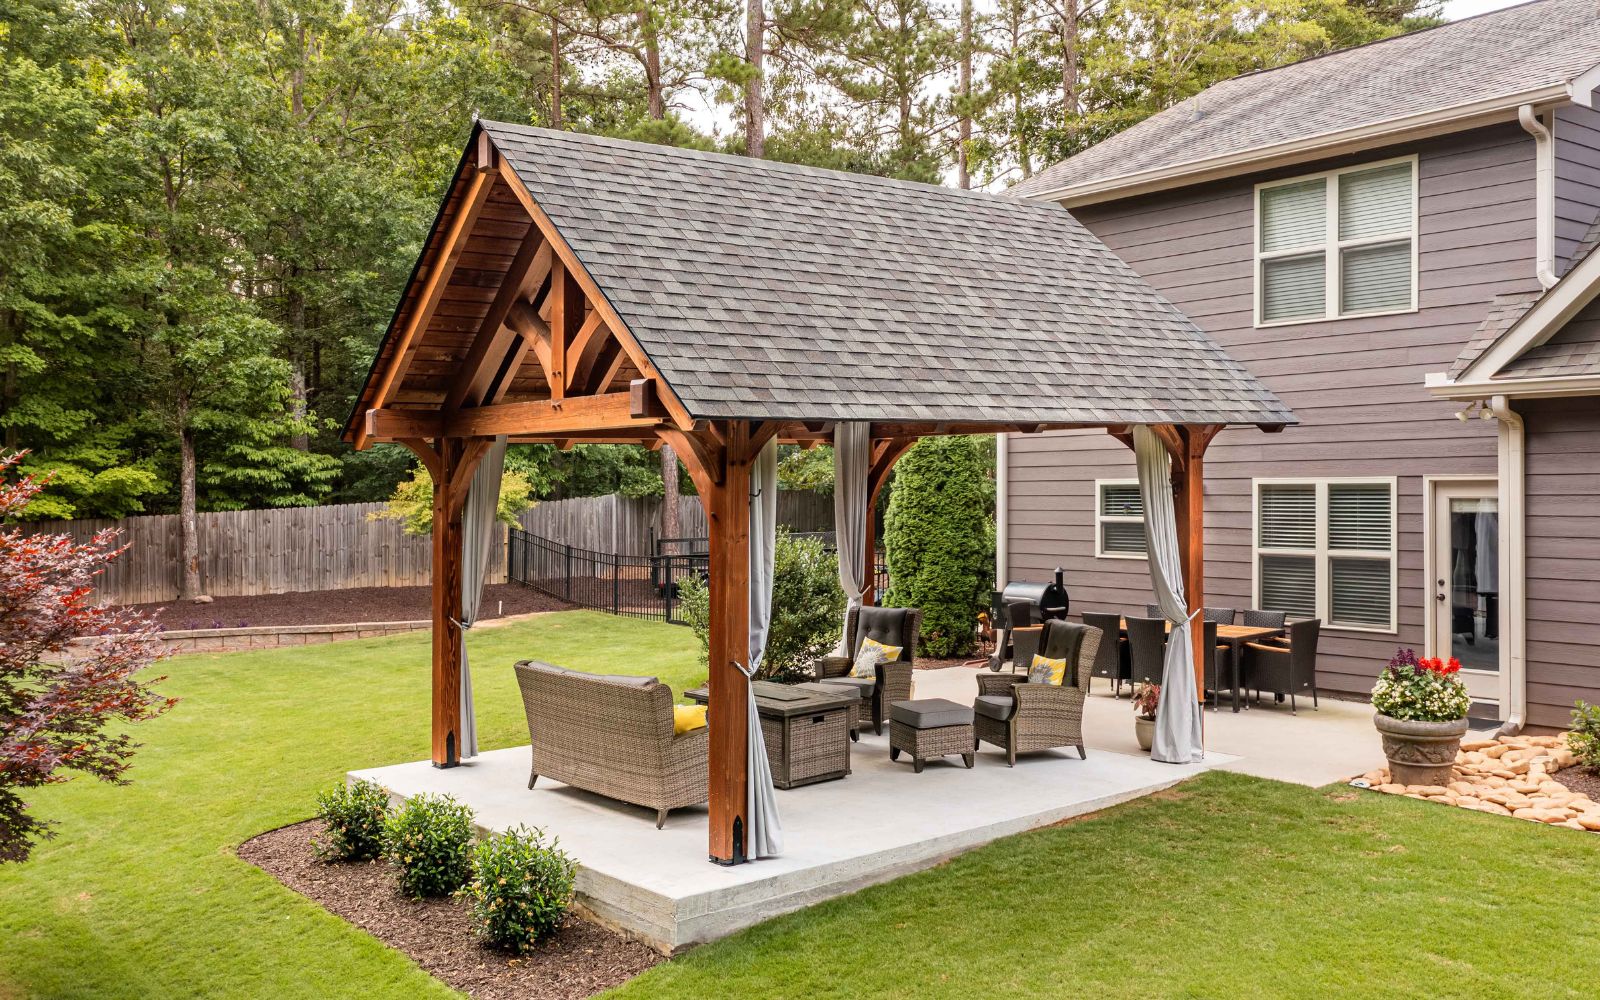
Your Pavilion, Your Design
Custom designing pavilions is one of our greatest strengths, and we take pride in turning your ideas into a finished space that feels personal. Your vision acts as the blueprint, and our experienced team brings it to life with expert craftsmanship and attention to detail. Every element can be tailored to reflect your unique taste and needs, from the shape and size to the finishes, roof style, and optional features. We work closely with you throughout the process to make sure the design not only looks beautiful but also fits your lifestyle and enhances how you use your outdoor space. The result is more than just a pavilion; it’s a retreat built just for you. With thoughtful design and quality construction, your perfect outdoor getaway is closer than you think.
360° View Of A Pavilion
(click and drag to navigate, zoom, or go full screen)
Frequently Asked Questions
What is the current lead time?
Lead times can vary depending on the project. The best way to get an accurate answer is to fill out a quote form, where your project’s current lead time will be displayed as you complete it.
Is Western Red Cedar an option instead of Douglas Fir?
Yes, Western Red Cedar is an option for a significant upcharge.
What is the difference between Post and Beam Construction and Timber Frame Construction?
Post and beam construction and timber frame construction may look similar at first glance, but they differ in how the joints are made. Post and beam relies on metal fasteners like bolts or brackets to connect large timbers, while timber framing uses traditional interlocking joinery that holds together without hardware. Post and beam is often quicker to build, while timber framing offers a seamless, time-honored look with unmatched craftsmanship. For a closer look at each style, see our Timber Frame vs Post and Beam article or dive deeper into Timber Frame Construction.
How to maintain a Timber Frame structure?
Timber Frame structures are beautiful but require regular maintenance to ensure they remain durable and attractive throughout the years.
UV rays (sunlight) and moisture (rain/snow) are wood’s natural enemies; hence, attention must be given to protecting the wood.
• Post Stand-off brackets, are important to elevate the posts above the patio surface. 3/4th inch stand-off brackets are included with all standard structures.
• Installing rain gutters minimizes splash-back of rainwater off the roof.
• We recommend staining your structure and consistently reapplying stain as necessary.
Stains typically last 1-3 years on the sections exposed to sunlight and moisture, and up to 10+ years in areas protected from the elements. It is better to re-stain before the original stain fades or shows obvious signs of wear.
Could I assemble a DIY Timber Frame Pavilion?
Yes — you could assemble a DIY timber frame pavilion from one of our pavilion kits if you enjoy construction projects and are comfortable with tools and teamwork. While you don’t need to be a professional carpenter, some experience with construction or DIY projects helps a lot.
See our video
Can I receive a drawing prior to placing an order so I know where to place the footers?
Yes. We can provide a drawing for the concrete footer placement before you place your order.
How long should the downrod on my ceiling fan be?
Where do we deliver and install Pavilions?
- Pavilions that are built on-site are typically available within 500+ miles of Southeastern Pennsylvania.
- Our DIY Kits are available across the continental United States.
Where do we deliver and install Timber Frame Pavilions?
- Timber Frame Pavilions that are built on-site are typically available in the eastern half of the United States.
- Our DIY Kits are available across the continental United States.
Do you sell vinyl pavilion kits?
We sell vinyl pavilion kits for the three styles of vinyl pavilions we install – the Shoreline Pavilion Kit, the Montford Pavilion Kit, and the Caribbean Pavilion Kit.
How much do pavilions cost?
Pavilion pricing can differ widely based on the sizes and materials you choose. To learn more about what influences the cost, check out our article on pavilion pricing or get in touch for a personalized free quote.
Which material is best for a pavilion?
Vinyl, wood, and timber frames are among the top materials people choose when building a pavilion. Each has its own advantages: some are easier to maintain, others are more budget-friendly or long-lasting. Are you curious about which one might work best for your space? Check out our guide on outdoor pavilion ideas for more insight.
Should I get a pavilion or a pergola?
Choosing between a pergola and a pavilion comes down to what you’re hoping to get out of the space. One of the biggest distinctions is the roof; pavilions feature a fully covered top that offers more shelter from the weather, while pergolas use an open-slat design that lets in more light. Because of the added structure, pavilions usually come at a higher price point. Want to dive deeper? Take a look at our comparison of pergolas and pavilions.
Can I mount a Timber Frame Pavilion on my wood/composite deck?
- Unless an engineer determines how to properly reinforce your deck, we do not recommend it.
- A good alternative method is to install concrete footers/piers under your deck, install the pavilion incorporating longer posts, and then install the deck boards.
Can I attach a Timber Frame Pavilion to my house?
- Typically, yes, but it usually requires additional planning, engineering, and inspections than a free-standing pavilion.
- The following are a few preliminary factors to consider:
- Is your house 1 story or 2 stories at the point of attachment?
- Will the posts or roofline interfere with any doors or windows on your house?
- Does your house have a basement in the area adjacent to the wall on which the pavilion would be attached?
- Whether LCB is able to offer installation of attached pavilions is dependent on the lead time.
Where does LCB ship DIY Timber Frame Pavilion kits?
Timber Frame Pavilion kits are available nationwide across the contiguous USA.
Where does LCB install Timber Frame Pavilions?
LCB installs TF Pavilions primarily in the Mid-Atlantic states, but can frequently offer installation in any of the states in the East.
Can I customize the Timber Frame Pavilion design?
- LCB is able to fully customize any of our structures; however, this can typically only be offered to a small number of customers per year. Smaller levels of customization are more readily available. The amount of custom jobs is dependent on the lead time.
- If customization is requested, the following Design Phase process can be expected:
- You provide the size and structure design/details.
- LCB will provide a budget number.
- You enter the Design Phase (payment required).
- LCB will draw the structure and work together with you to adjust the design as needed.
- LCB will provide a firm estimate.
How do I order a Timber Frame Pavilion?
- Request a formal estimate.
- Sign the estimate and provide the deposit.
- Your structure is ordered!
My patio is sloped. Do you factor this in while onsite?
Yes! We use a laser level and cut the posts onsite as needed.
Can I mount a pavilion on my wood/composite deck?
- Unless an engineer determines how to properly reinforce your deck, we do not recommend it.
- A good alternative method is to install concrete footers/piers under your deck, install the pavilion incorporating longer posts, and then install the deck boards.
Can I attach a pavilion to my house?
- Typically, yes, but it usually requires additional planning, engineering, and inspections than a free-standing pavilion.
- The following are a few preliminary factors to consider:
- Is your house 1 story or 2 stories at the point of attachment?
- Will the posts or roofline interfere with any doors or windows on your house?
- Does your house have a basement in the area adjacent to the wall on which the pavilion would be attached?
- What does the exterior of your house consist of (Vinyl siding, Hardie, Brick etc.)? A vinyl siding scenario is usually the simplest if attaching to a pavilion. The approximate additional cost for a pavilion attached to a home with vinyl siding is $8-12k.
- Whether we are able to offer attached pavilions and the installation of the pavilion to your home, is dependent on our current lead time.
Do I need Post Standoffs?
If your structure has exposed wooden posts and the patio consists of pavers with concrete footers/piers under the pavers, post standoffs are recommended so the bottoms of the wooden posts do not reside beneath the patio surface. The top of each concrete pier should be located 2.5” beneath the top of the paver stones in that exact area. (View example PDF here)
Do you sell wood pavilion kits?
We sell wood pavilion kits for the two styles of wood pavilions we install – the Lakefront Pavilion Kit and the Cheyenne Pavilion Kit.
Can I place a pavilion on bare ground?
To place a pavilion on bare ground, you should first install concrete piers just a bit above the surface of the ground.
Are permits required?
In many cases, permits are required. Permit requirements often vary by state, county, city, or local municipality. Check your state and local laws for the most accurate permit requirements for you! Lancaster County Backyard does not obtain permits.
Where does LCB ship DIY Pavilion Kits?
LCB ships DIY pavilion kits primarily within a 1,000-mile radius from our location.
Where does LCB install Pavilions?
- LCB installs Pavilions primarily in PA, NJ, DE, MD, VA, NY, and CT.
- LCB installs typical-sized backyard structures within an approximate 200-mile radius of our location. Outside of this approximate range, it may become cost-prohibitive for you.
- For larger units (24×24 and larger), LCB occasionally offers installation outside 200 miles.
What type of wood is used in a timber frame pavilion kit?
Lancaster County Backyard uses Douglas fir for our timber frame pavilion kits and all other timber frame structures. We also offer Western Red Cedar as an option for a significant upcharge.
How do I order a Pavilion?
- Request a formal estimate.
- Sign the estimate and provide the deposit.
- Your structure is ordered!
How to start planning for your outdoor living structure?
- See the Guidebook for important preparation steps.
- Send photos and measurements of the desired location for your timber frame structure to sales@lancastercountybackyard.net.
- We will be happy to review your photos and discuss possible scenarios/ideas with you.
- A site visit/consultation can be requested for a fee based on your location.
Can LCB provide engineered stamped drawings if required by your municipality?
In most states, we are able to provide engineered/architectural stamped drawings for pavilions for an additional fee. Contact us to begin the process.
What is the Difference Between a Timber Frame and a Traditional Pavilion?
A timber frame uses large, heavy timbers joined with mortise and tenon to form the primary structure, whereas traditional construction relies on smaller dimensional lumber fastened with nails. Learn more about the difference here.
What is the Lifespan of a Timber Frame Structure?
A properly built timber frame structure, when well-maintained, can last for over 100 years. In fact, many ancient timber frame buildings still stand today as proof of their durability and craftsmanship. The key to longevity is protecting the wood from moisture and pest damage. That said, an outdoor timber frame structure without walls typically has a shorter lifespan of around 20–40 years.
Can I build a timber frame pavilion kit myself?
Yes. Our DIY timber frame pavilion kits are designed for homeowners or builders who want a hands-on project. If you’re outside of our timber frame installation service area, you can still order one of our timber frame pavilion kits and build it yourself or hire local help.
Is a Permit Required for a Timber Frame Structure?
In most cases, permits are required for building projects. Permit requirements often vary by state, county, city, or local municipality. Lancaster County Backyard does not obtain permits for our timber frame sheds, pavilions, or other backyard structures. Check your state and local laws for the most accurate permit requirements for you!
Are your timber frame pavilions made by hand?
We believe quality starts with precision. That’s why our craftsmen use advanced CNC routers and computerized equipment to cut each timber frame with accuracy. Every piece is handled, even when heavy members are positioned with lifts rather than carried by hand. Many pieces are hand-sanded, while the remaining timbers are sanded with a large timber sander. The result is machine accuracy with careful human attention at every step.
Why choose a wood pavilion kit over vinyl?
A wood pavilion kit is a better fit if you prefer a warm, natural-looking pavilion that can be customized with different stains or paints. Plus, wood pavilion kits typically have a lower upfront cost than vinyl, even though it requires more upkeep over time.
Why choose a vinyl pavilion kit over wood?
A vinyl pavilion kit is ideal if you want an outdoor structure that stays looking clean and fresh with little upkeep. Unlike wood, vinyl doesn’t need to be stained or painted and resists rot, insects, and warping over time.
What’s the best way to care for a wood structure?
The milling of lumber creates an extremely smooth surface. For wood pavilions, you can choose a factory-stained finish, or wait to apply the first coat about three months after installation, so most checking is visible and the drier surface accepts stain more evenly; for care tips, see this blog post about “Preserving Outdoor Wood”. For timber frames, we recommend selecting the factory-stained timber option for optimal results and strong UV protection, and reapplying stain on a consistent schedule as exposure and weather demand.
Will the wood check on my structure?
Wood checking is a natural part of owning a wood structure; on pavilions, pergolas, and gazebos, it usually appears in the first year and is mostly cosmetic. Some choose to wait about three months after installation before staining so the wood can settle. On timber frames, checks are typically larger and change with the seasons, yet in a properly engineered structure, they do not indicate a loss of strength.
Does vinyl cost much more than wood?
The extra expense of covering and constructing a vinyl structure makes it 20-40% more expensive than it’s wood counterparts.
Why do timber frame pavilions cost more than standard wood or vinyl pavilions?
The sheer amount of wood required for a timber frame construction makes it more expensive than it’s wood or vinyl counterparts. Also, the mortise and tenon style of building requires a higher level of engineering and expertise to complete. These factors combine to make a timber frame pavilion cost more than standard wood or vinyl.
Can I mount a pavilion on a concrete pad?
We recommend that the pavilion columns are placed on concrete piers (cut the concrete and place piers in).
Can I mount a pergola on my deck?
If you’re mounting to an existing wood deck, a good mounting method is to drop the posts down through the deck and secure them to the joists. The recommended method is to take the wooden portion of the post down through the deck. (Trim pieces for vinyl make this a bit simpler.)
Can I mount a pergola or pavilion to my paver patio?
We do not recommend fastening to pavers. They do not provide structural stability and are not a secure anchoring method. The recommended method is to install concrete piers approximately 18” in diameter and 36” deep. First, remove a section of pavers at each post location. Then dig down 36”. Fill with concrete to approximately one to two inches below the bottom of pavers. After the pergola or pavilion is installed, the pavers can be cut to fit and replaced around the columns. [Note: Footer size to be verified per job.]

What kinds of foundations are needed for timber frame pavilions?
Concrete piers are the primary choice for setting up our pavilions, as they provide a strong and lasting base. While we can secure the structure to other types of foundations, concrete piers remain the most common and recommended option for outdoor installations.
Do you factory stain your wooden structures?
We do offer premier-quality stain in a variety of shades and colors. Although this service provides the most convenient staining option for your structure, it’s even better to wait for staining until three or four months after construction. Dryer wood receives stain better, though you don’t want to wait so long that oxidation becomes evident and the wood starts to gray. Ask us for more direction on the ideal staining procedure for your project.
Will the exposed posts and beams check over time?
A check is the name given to cracks that form on the surface of wood columns, and results from the outermost layers drying and contracting before the inner core. Checking is considered an inevitable feature of wood construction, and simply adds to the unique character of each piece of wood. For lumber that is less susceptible to deep checks, choose #1 Douglas Fir for your exposed wooden structure.
Do you use exclusively mortise and tenon joinery in timber framing?
Mortise and tenon is the architectural term for the joining of posts, beams, and braces using a tightly interlocking design that’s secured with wood pegs rather than metal fasteners. Projects that feature exposed beams with mechanical fasteners are typically classified as post and beam construction rather than timber frame. While mortise and tenon is preferred on our timber frame projects, depending on the design we may suggest the inclusion of hidden, minimal, or artfully integrated metal brackets and straps in order to maintain budgetary requirements, or produce a different kind of look.
What kind of lumber do you use for timber framing?
Our timber frame structures are forged from #1 Douglas Fir – a deluxe-quality lumber preferred by many people. One inch solid oak pegs are used in the mortise and tenon joinery.
I still have more questions.
Please don’t hesitate to reach out. We welcome your questions and are happy to discuss your project in more detail. Call us at 267 638 6983 or email us at sales@lancastercountybackyard.net.
See OUr Work


Testimonials & Reviews
We just had our new 10×12 Gazebo installed yesterday. It’s even prettier than we imagined and the installers were fantastic. So happy–thank you LCB!
Great service! Excellent craftsmanship! Highly recommend!
professionally built gazebo with good price, very well equipped delivery and smooth installation
I own a construction company and can appreciate a professional crew that grinds throughout the day to complete their project. I received exactly what I asked for and the cleanup that followed was exceptional.
We just had a 14×16 pavilion built and we love it! It’s exactly what we wanted. It is well constructed and completed on time. All of the workers were very professional and on time. We would highly recommend.
It’s rare you come across a contractor now a days that is courteous throughout the process, shows up when they say they will, and gives you more than you could have hoped for!
Well done Lancaster County Backyard!
They do great work. I looked at several companies and I am very pleased with the quality of the structure and the service they’ve provided.
He handled my concerns . Elmer went over every detail with precision. I received consistent emails from Elmer on the progress of what I wanted exactly. Together we came up with a beautiful 14×28 high wall barn
Garage. Within 3 weeks Elmer contacted me about ground work and grading with the stone.
They actually brought the garage the same day. Ivan and his son worked for 8 hours till the spot was perfect.
They dropped the garage in place with precision. In this day and age it is rare to have a company and employees that care about there product and service. I personally thank Elmer Lee, Ivan and Jason
For there exceptional work ethics. All I can say is if you need a shed,garage, gazebo you will definitely want to visit Lancaster County Backyard on New Holland Rd. In Kinzers,Pa.
You will be very happy from beginning to end.
Sincerely, David Chimchirian
Am very happy with Lancaster County Backyards. Our 14 foot gazebo was delivered on time and is a beautiful addition to our yard.
It was an absolute pleasure dealing with your company and you personally. We are so happy with the finished product.The workmanship is superior to other shed companies. We have and will recommend you to our friends and family. Thank you
A great group of people to deal with. Our gazebo was built with quality materials and exceeded our expectations. My wife and I enjoy both breakfast and dinner there as often as we can. We love the openness and shade it offers.
Wonderful experience with the planning and building of our pavilion. They were so helpful and the workmanship was top notch. It’s become the new favorite part of our home. We love sitting outside in the rain!
Excellent experience with the construction of a custom pergola. Very professional. Work was done efficiently and first rate quality. Highly recommend.
The re-roof these folks performed on our cedar shake gazebo was beautiful. The attention to detail was particularly impressive. Everything was removed and replaced in one day. Fantastic!
Get A Pavilion Buying Guide
